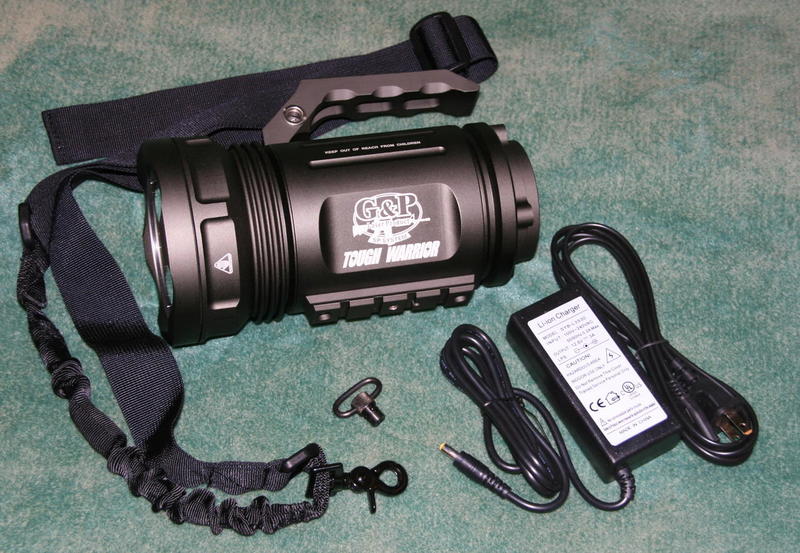
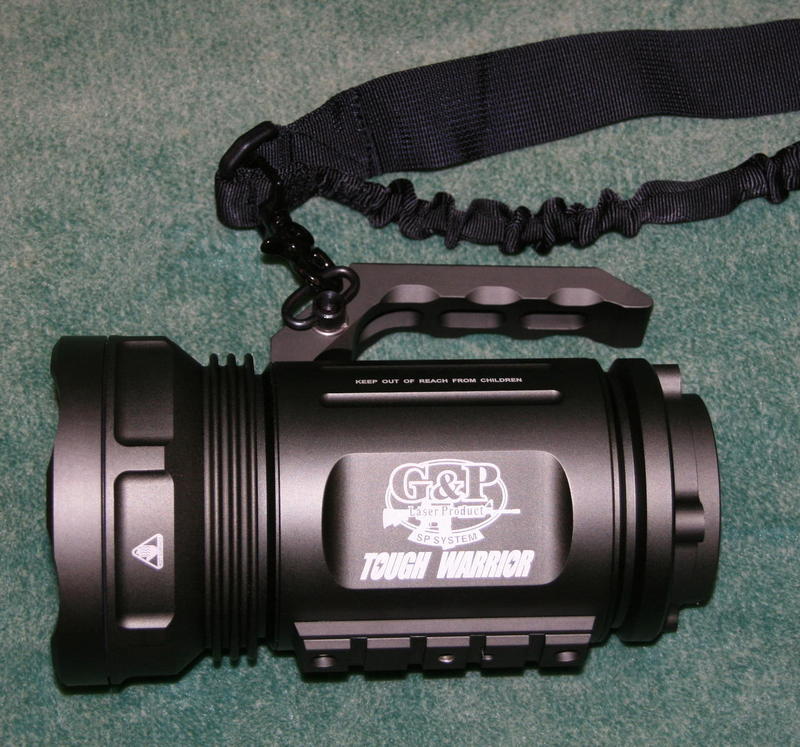
| Description: Full T6061 Aluminum Construction Rated 3500 Lumens G&P 35W HID, 9005 Bulb Base, 6000K (GE or Phillips Bulb Optional) Built-in 11.1V 4400mAh Li-ion Rechargeable Battery On/Off Rubber Boot Click Switch AC Charger Swivel Sling Strap Runtime: Approx. 85 minutes 1913 Standard Rail Attachment (Picatinny/Weaver) Finish: Black Hard Anodized Type IIIFirst Impressions: I was contacted by www.BugOutGear.com about reviewing this light, after I expressed interest in a thread onwww.candlepowerforums.com This is one of the best looking HID lights I have ever seen. Actually, its one of the best looking lights period. It has a very rugged military look to it, and is built just as rugged as it looks. I have owned and used a few other HID lights in the past, but all were mostly constructed of plastic, and were not even rain proof. The G&P HID is one of the first Aluminum constructed HID lights I have seen with a reasonable price. Some have said it reminds them of the Surefire Hellfire design, a light designed for military use, that is well over $5,000. There are a couple other Aluminum HID lights out on the market now also, but most are in the $2000+ range. The G&P HID will be sold for approximately $400, well below similar designs. |
|
|
|
|
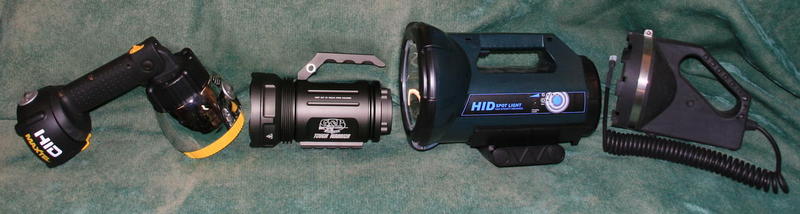
| Size/Weight: The G&P HID is a bit heavier than it looks at first for its size. There is quite a bit of aluminum here, as most of the light is very beefy and rugged. I believe the reason the weight surprised me a little at first, is the fact that I am used to all my other HID lights being made of some sort of plastic, with very little metal. That is not to say the G&P is overly heavy, it actually weighs less than all my other HID lights. Its weight to size ratio is simply higher. |
|
|
|
|
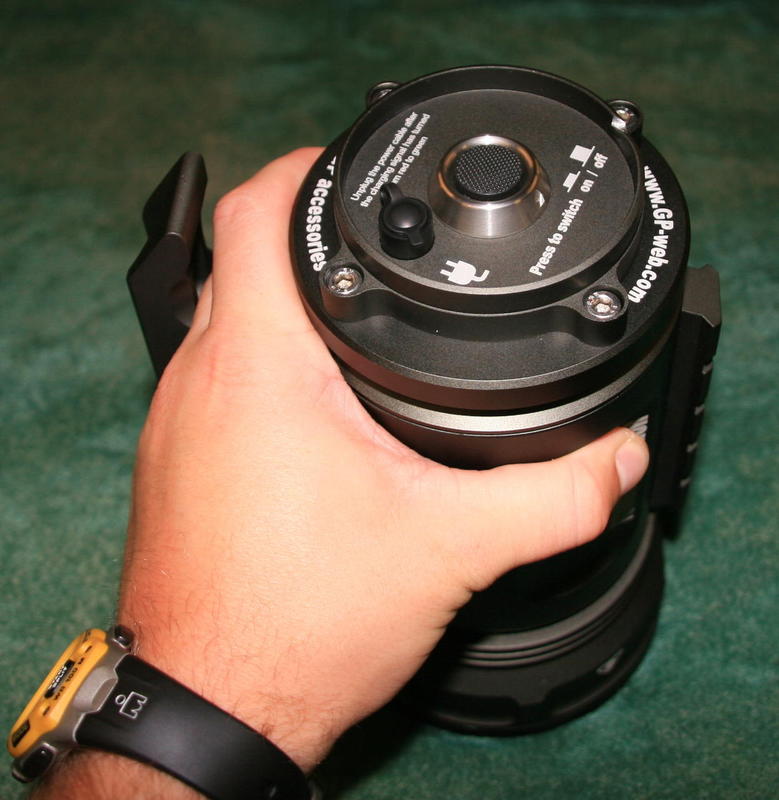
| Grip/Handling: The light is a good bit smaller than any of my other HIDs, and feels very balanced. The light is only slightly front heavy when holding it. The smaller size makes it quite maneuverable, and the large handle is very easy to grip, even with large thick gloves on. |
|
|
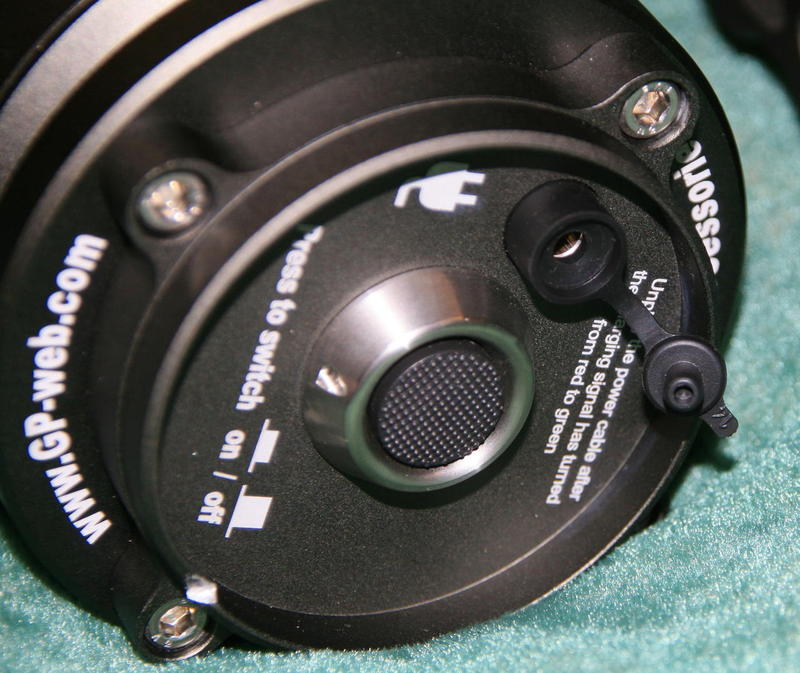
| The clickie switch on the rear of the light is very tactile with a nice click to it. It is a reverse clickie, which is actually a good thing for a light like this. There is very little chance of this light accidentally turning on. So it should be safe in a backpack, etc. You must fully click the button and release it before the light turns on. The switch location is good and bad. It is well guarded at the rear of the light, but you can not turn the light on with one hand while you are holding it. This is not a big deal though, as you should never turn any HID light on and off frequently. Most all HIDs have a bit of a warm up time when you first turn them on, taking a few seconds to reach maximum brightness, and they stay rather hot after you turn them off. Flashing the light on and off can hurt the bulb and ballast, as the startup is the hardest on the ballast. |
|
|
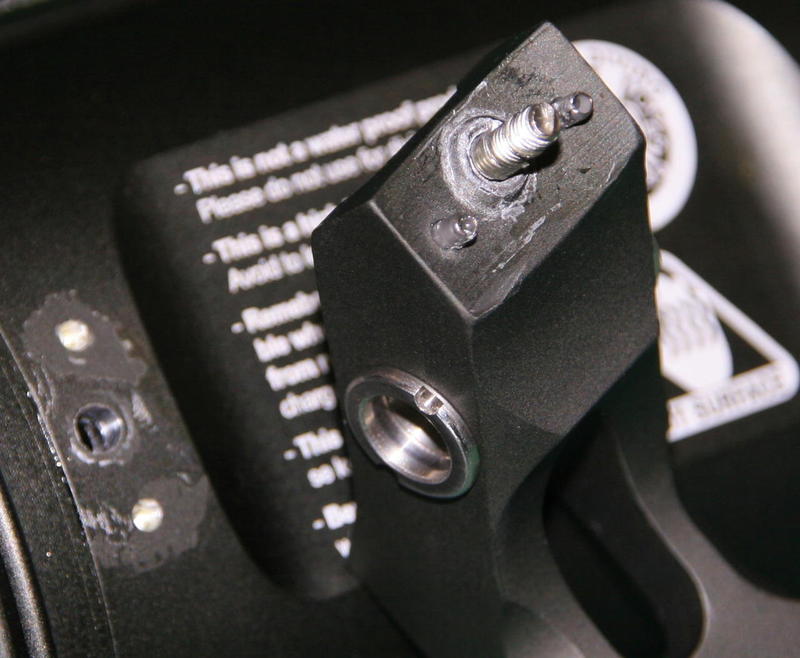
| Build Quality & Design: The G&P HID is made quite well. There are no thin walled sections as far as I can tell. The bezel is nice and thick, so it should protect the lens rather well. Shouldn’t have to worry about bending it out of shape from a drop, etc. All the machining is smooth, there are very few machine marks, and the HA III finish is quite even and looks great. I would have to say that the weak point, structurally, is the handle. It attaches with one bolt that connects to a nut on the inside of the body. Although, there was some thought put into this. There are two metal tabs that protrude out of the handle, these tabs insert into divots in the body on either side of the bolt hole. These prevent the handle from rotating, so the bolt only has to worry about holding the handle on, and not actually holding it in place. This seems to help alot, there is little to no twisting of the handle. I am not saying the handle is going to break off, but one end is secured with the bolt, and the other end is “floating”. This makes it have a bit of give to it if you push or pull on the floating end. No big deal, I dont think it should be a problem. |
|
|
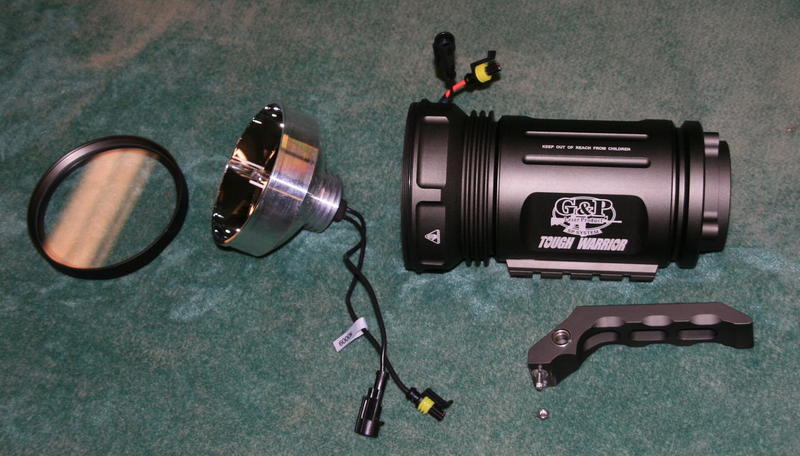
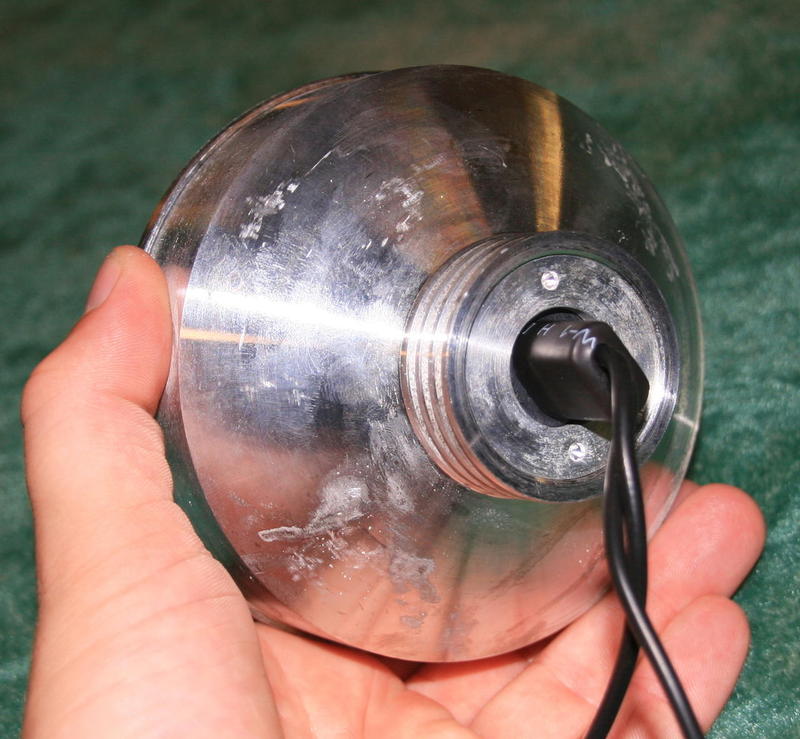
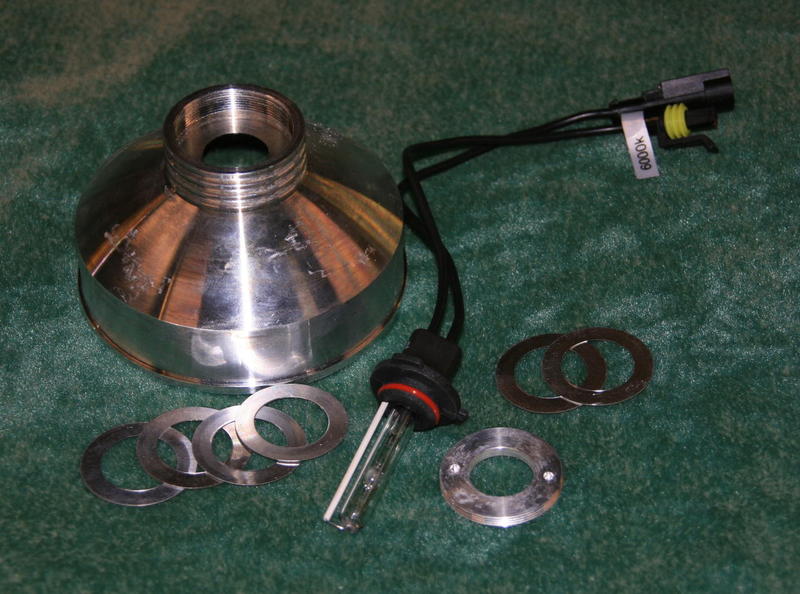
| The reflector is made of aluminum as well, and can be taken out of the light easily after removing the bezel. I was very pleased to see how the reflector, and the inside of the light was designed. First off, the bulb is a 9005 bulb type, and can easily be replaced, as the wires simply unclip from the ballast wiring. |
|
|
| The bulb is held in place with a threaded retainer ring. After removing the retainer ring I got another pleasant surprise. There are 6 thin metal shims here, 4 in front and 2 in back of the bulbs flange. These are used to shim the bulb forward or backwards in the reflector, so that you can adjust it some for the best focus. There is just a bit of play between the bulb and the reflector hole, so you can also adjust that some to center it properly. It can be a bit tricky to hold in place as you tighten the retainer ring, but after you have it in place and tightened down, the bulb seems to stay in place well. |
|
|
|
|
| Another nice feature is that the wiring is long enough that you can actually have the reflector outside the light, and still have it connected and running. This allows you to test your beam pattern, before reassembling the light. |
| The ballast and Li-Ion battery pack are mounted to a metal plate, that is slide into grooves inside the body. For the most part, this keeps all the components from touching the body of the light. Everything seemed to be held in place well, and I see no reason knocking the light around should harm any of the internal components. Though, I do have concerns about the ballast not being able to transfer its heat away from itself to the body of the light. The ballast should be able to handle shock easier than heat, so it would have been nice to see the ballast placed against the body with some thermal epoxy. This would have taken advantage of the huge mass of aluminum the body of the light has. |
|
|
| The connections between the battery pack and the ballast are at the rear of the light, so I was not able to get a good look at those. I never disassembled the rear of the light enough to get to that part. I was not sure how it was designed, and seeing how this light is not mine, I didnt want to risk damaging it. So, for the most part, swapping out the battery pack, especially out in the field, is not possible. |
| There is a standard Picatinny or Weaver rail on the bottom of the light, attached with two bolts. This is a neat feature, though I am not sure what they had in mind when they added this to the light. I attached my Streamlight TLR-1 weapon light to it for the heck of it. I actually kinda liked it, it gave the G&P a secondary lower output. Even though it looked a bit odd. Other things that come to mind for the rail are a set of bi-pods from a rifle. There are also some nice forward pistol grips for assault rifles that would work well on the rail. |
| There is also a threaded hole in the middle of the rail. At first, I thought this was for a tripod, but it doesn’t seem to be the same threading. The good thing is, the rail can be easily removed, and drilled and tapped for any threading you would like. The rail is quite beefy and there is plenty of metal to drill and tap. |
| Water Resistance: This is one of the aspects of the light I was most interested in testing. None of my other HIDs are water resistant, except my Havis, which takes an external battery pack, which makes keeping it water tight much harder. Hot to mention its much more bulk. I was able to disassemble the front of the G&P HID. Taking off the bezel and lens. There is an oring between the bezel and lens, as there should be. There is also an oring between the bezel and head of the light. |
| I was not able to disassemble the rear of the light. it seems that all the bolts have a bit of epoxy on them, and even after removing them, the rear plate would not come loose from the body. I figure there is some epoxy between there also. It seems that all the bolts have some sort of epoxy or loctite on them, and there is a reason for this. The one design flaw, as far as I am concerned, with the G&P, is the fact that all the bolts run INTO the body of the light. If you take one of the bolts out, you can see right into the body of the light. While this makes it strong, and reduces the risk of the threads stripping, especially with the handle using a nut on the under side. It also creates access points for water to get inside the light. As it is, I think the light should handle heavy rain just fine. Just make sure the rubber plug is inserted in the charging port. That is probably the weakest link as far as water tightness. If you plan to use the light in alot of wet conditions, you may want to make sure each bolt has a good amount of epoxy or silicone on it. Especially the bolt that attaches the handle. All in all, it is one of the most water resistant 35W HIDs I have tested, and may very well be the most water tight in its price and performance range. But I would not recommend totally submersing the light. |
|
|
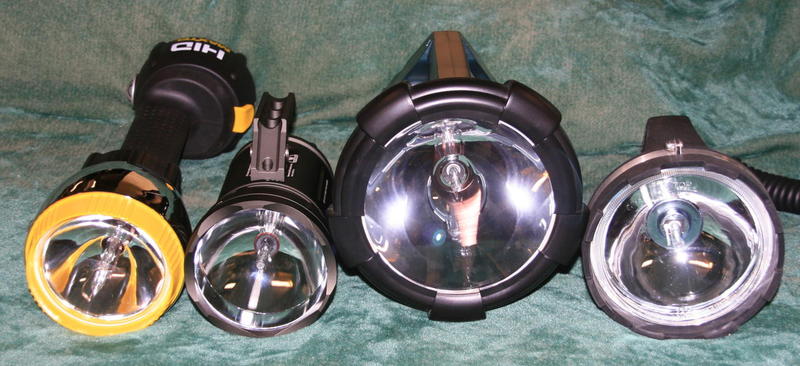
| Output: Output seemed to be on par with most other 35W HID lights, and the warmup/startup time was pretty fast. Unfortunately, I did not get a chance to directly compare it to my other HID lights outdoors. I did however compare it to my X990 indoors. While it is very hard to tell comparing indoors, the X990 did seem to have a bit of an edge over the G&P for total output, or lumens. Though, the G&P had a tighter hot spot, and I would assume would throw a bit further than the X990.Runtime: Runtime is rated for 85 minutes on a full charge. I setup a runtime test, using a light meter and DMM that I have hooked to my laptop in order to log the runtime in a graph. I also placed a 120mm computer fan next to the light to help cool it, as I do for most my runtimes. The runtime started out just fine, and the G&P HID ran for 59 minutes with rock solid regulated output, not dimming at all. |
| Then something rather unexpected happened. The light simply went out. No flickering or strobing at all. Most HID lights will start to flicker or strobe, when the battery voltage gets too low for the ballast to stay regulated. At this time you should shut off the light as recharge it. Letting a HID light flicker or strobe can damage it. I didnt think much of this at the time, although I was quite disappointed it only ran 59 minutes of its claimed 85 minute runtime. But I thought, oh well, and plugged the light into its charger to charge back up. After about 2 hours or so the light was fully charged again. I unplugged the light, and turned it on. This is where things go all wrong. The light would not turn on, it would only strobe the bulb very dimly. So dim you could stare right into the bulb, and see it emit small blue arcs. The light would do this for a few seconds then die completely.At first I thought the bulb may have blown. Luckily, I had another bulb with the same wiring, so I swapped bulbs and tried it again. Same results as last time, only a soft arcing. So its not the bulb. Next I measured the battery packs voltage, which read 12.54V, that seems just about perfect for that particular pack. So I dont think it was the battery pack. That leaves the ballast, which is the last thing you would want to go bad. My guess is, unless this was a faulty dud unit, the ballast most likely failed due to excess heat. Charging: |
|
|
|
|
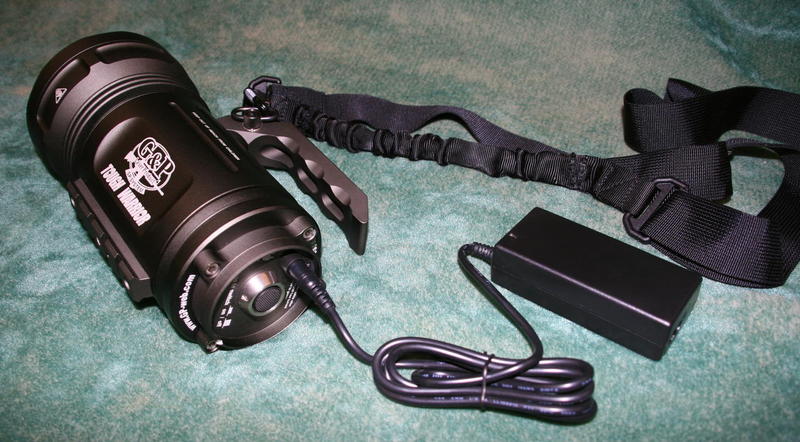
| Other Features: – Included plastic water tight case. My review unit did not come with a case, so I can not comment much on this. But the G&P HID will come with a plastic water tight case, similar to Pelican cases. This is a nice touch, and easily worth $20 to $30.– Included shoulder strap, with quick release. The light comes with a shoulder strap, or sling, that is similar to what you would find on small assault rifle. There is a quick release sling attachment included, that pops into a hole in the lights handle. The strap seems plenty strong enough to support the light and should come in handy for long periods of use. – Li-Ion internal battery pack. Pros: Cons: Conclusion: I apologize for not being able to do any beamshots. I was going to do them the next day after work, but the light failing during the runtime test put a stop to that. |